Butterfinger Balls are an irresistible dessert that combines the familiar crunch of Butterfinger candy bars with creamy, melt-in-your-mouth goodness. This article will take you through everything you need to know about making and enjoying these sweet treats. From the essential ingredients and preparation tips to creative variations and serving ideas, you’ll be a Butterfinger Ball expert in no time. Let’s dive into this no-bake wonder and discover how easy and fun it is to make!
Introduction to Butterfinger Balls
What Are Butterfinger Balls?
Butterfinger Balls are small, round desserts made with crushed Butterfinger candy bars, a creamy base, and optional chocolate coatings. They’re no-bake, meaning you don’t need to turn on the oven—a huge plus for busy days or hot weather! This simple recipe brings together crunchy, chocolatey, and peanut butter flavors into bite-sized delights that are perfect for parties, snacks, or gifts.
The appeal lies in their simplicity. With just a few ingredients and no baking skills required, anyone can make them. Kids especially love these fun, bite-sized goodies!
Why Are They So Popular?
These little balls of joy are popular for a few reasons:
- Ease of preparation: A few steps and no baking!
- Universal appeal: Who doesn’t love Butterfingers?
- Customizable: You can add your own twist with toppings or mix-ins.
- Perfect for any occasion: Whether for holidays, parties, or a late-night treat, they fit right in.
Not to mention, they’re a nostalgic dessert that brings back childhood memories for many. With such a simple recipe, anyone can whip up a batch and impress their family and friends.
Now that you know what makes Butterfinger Balls so special, let’s move on to the ingredients and preparation. Trust me, it’s easier than you think!
Ingredients and Preparation
Essential Ingredients for Butterfinger Balls
To make Butterfinger Balls, you only need a handful of ingredients that are likely already in your pantry. Here’s the list of what you’ll need:
- Butterfinger candy bars: The star ingredient, crushed into small pieces for that irresistible crunch.
- Creamy peanut butter: It binds the mixture and adds a rich, nutty flavor.
- Powdered sugar: For sweetness and consistency.
- Butter: Adds moisture and helps hold everything together.
- Chocolate coating: Use melted chocolate chips or candy melts for dipping.
Each ingredient works together to create the perfect balance of crunch, creaminess, and sweetness. If you’re looking for substitutes or healthier alternatives, such as low-sugar options, we’ll cover that in the variations section.
Where to Find Ingredients for Your Butterfinger Dessert Balls
You can find most of these ingredients at your local grocery store. Butterfinger candy bars are available in the candy aisle, while the rest can be found in the baking section. For those who want to go the extra mile, some specialty stores also sell crushed Butterfinger pieces to save you time.
Preparation Tips for No-Bake Butterfinger Bites
Before you start making your Butterfinger Balls, set yourself up for success:
- Gather all your ingredients in one place.
- Use a food processor to crush Butterfingers evenly. If you don’t have one, place the bars in a zip-top bag and crush them with a rolling pin.
- Line a baking tray with parchment paper for easy cleanup.
Now that everything’s prepped, you’re ready to move on to the fun part—making the balls!
Step-by-Step Recipe Guide
Crushing the Butterfingers for Perfect Butterfinger Balls
Begin by crushing your Butterfinger candy bars. For the best texture, aim for small chunks mixed with a fine crumb. This ensures that each bite of your Butterfinger Balls delivers the perfect crunch.
Mixing Ingredients for No-Bake Butterfinger Treats
In a large mixing bowl, combine the crushed Butterfingers, peanut butter, powdered sugar, and softened butter. Use a spoon or your hands to mix until everything is evenly blended. The mixture should be firm enough to roll into balls but not too sticky.
Rolling and Shaping Your Butterfinger Balls
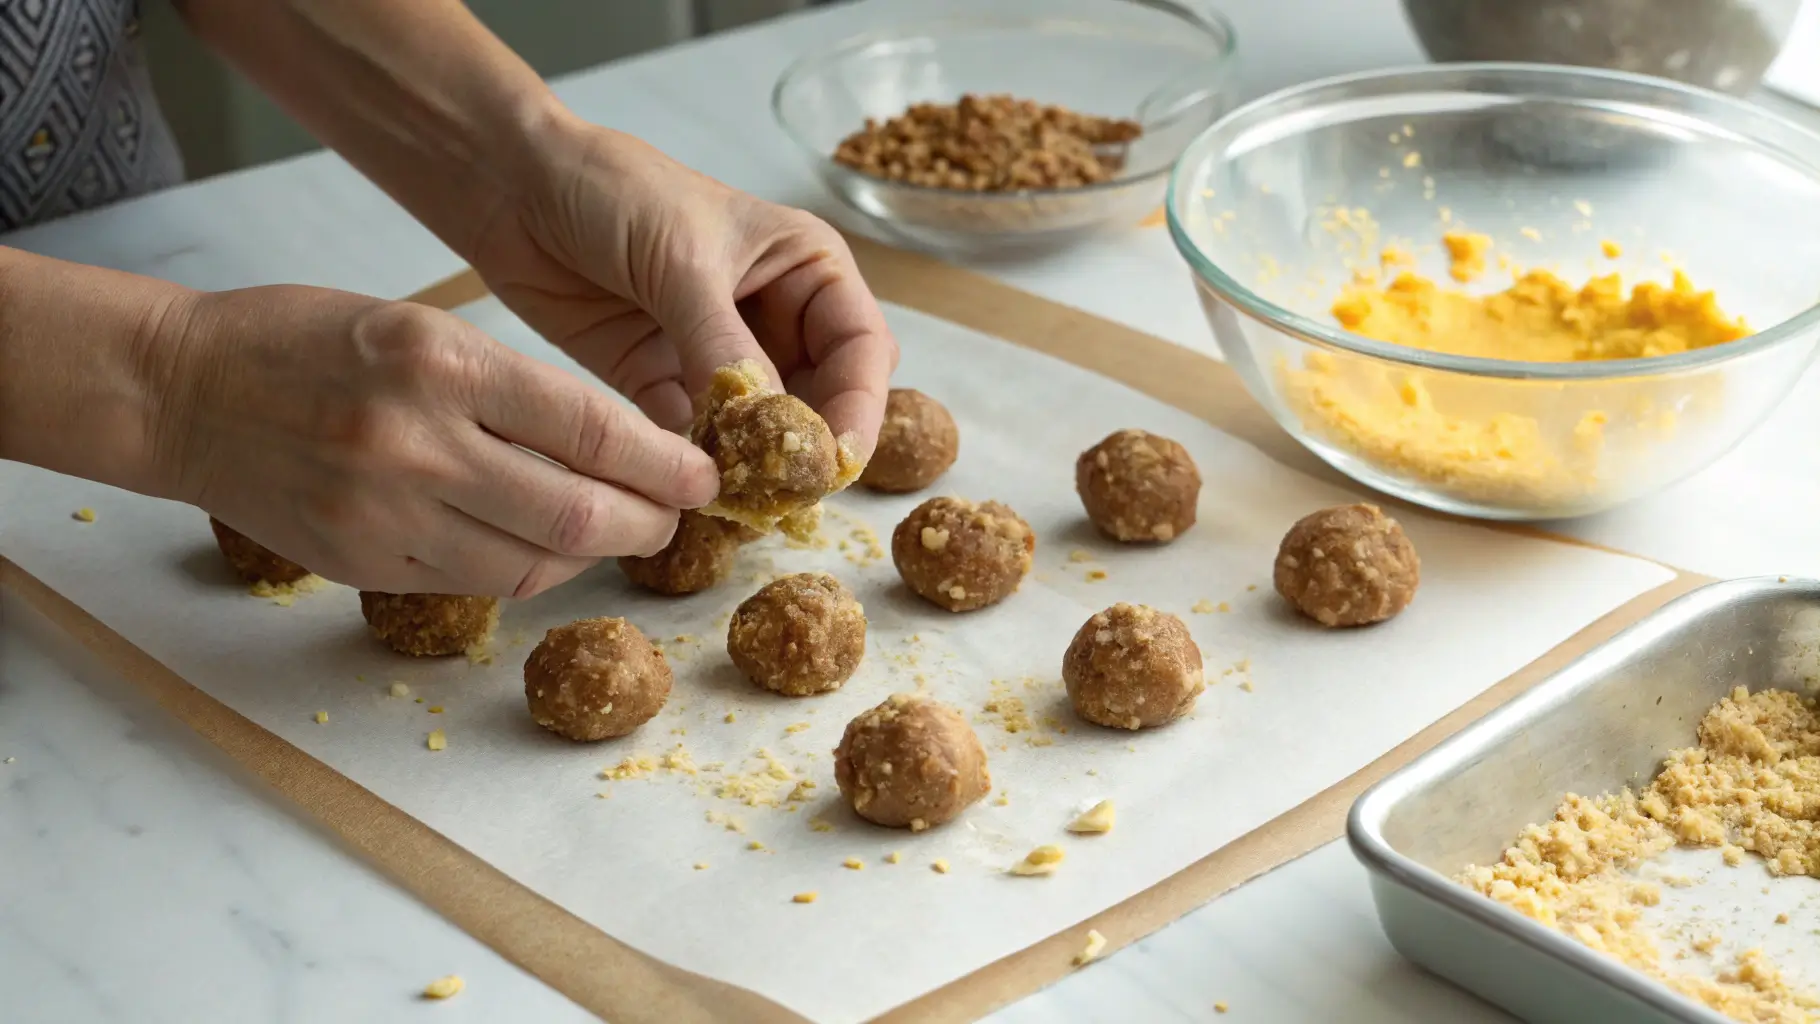
Take a small amount of the mixture and roll it between your palms to form a ball, about 1 inch in diameter. Place the balls on the prepared baking tray. Pro tip: If the mixture starts sticking to your hands, lightly dust them with powdered sugar.
Coating Options for Butterfinger Dessert Balls
For an extra layer of indulgence, dip each ball into melted chocolate. Using a fork or toothpick, roll the ball in the chocolate until fully coated, then place it back on the tray. Sprinkle with crushed Butterfinger pieces, nuts, or sprinkles for a decorative touch.
Once all the balls are coated, chill them in the refrigerator for at least 30 minutes to set.
With your Butterfinger Balls ready to go, why not explore some fun twists and creative ideas in the next section? It’s time to get inventive!
Variations and Creative Twists
Adding Nuts or Crunch
Want to take your Butterfinger Balls to the next level? Try mixing in chopped nuts or other crunchy add-ins like pretzels or cereal.
- Chopped peanuts: Boost the nutty flavor and add extra texture.
- Crushed pretzels: Introduce a salty, crunchy contrast to the sweetness.
- Crisped rice cereal: Light and airy crunch that pairs perfectly with the Butterfinger pieces.
These additions give you endless possibilities to customize your treats and make them truly unique.
Making Them Healthier
If you’re aiming for a lighter version of this dessert, there are several ways to tweak the recipe:
- Low-sugar alternatives: Use sugar-free peanut butter and powdered sugar substitutes.
- Dark chocolate coating: Opt for dark chocolate instead of milk chocolate for a less sweet option.
- Vegan adjustments: Replace butter with coconut oil and use dairy-free chocolate for a vegan-friendly twist.
These substitutions make it possible to enjoy Butterfinger Balls without compromising on flavor!
Seasonal Flavors
Add a seasonal spin to your recipe by incorporating festive ingredients:
- Pumpkin spice: A dash of pumpkin pie spice for fall-inspired treats.
- Peppermint pieces: Crushed candy canes during the holiday season.
- Colored sprinkles: Match the decorations to the occasion, like red and pink for Valentine’s Day.
For more creative dessert ideas, check out our hybrid dessert guide for inspiration!
Tips for Perfect Butterfinger Balls
Common Mistakes and How to Avoid Them
Making Butterfinger Balls is simple, but a few hiccups can pop up. Here’s how to steer clear of the most common issues:
- Sticky hands: Dust your palms lightly with powdered sugar or chill the mixture briefly if it’s too sticky to roll.
- Melting chocolate troubles: Melt your chocolate slowly over low heat or in 30-second bursts in the microwave, stirring often. Overheating can cause it to seize.
- Uneven shapes: Use a small cookie scoop to ensure uniform sizes.
With these tips, your Butterfinger Balls will look as good as they taste!
Storage Tips
Proper storage is key to keeping your Butterfinger Balls fresh and delicious:
- Refrigeration: Store them in an airtight container in the fridge for up to a week.
- Freezing: For longer storage, freeze them for up to 3 months. Thaw at room temperature for a few minutes before serving.
Make a batch ahead of time and always have a sweet treat on hand!
Now that you’ve mastered the art of creating and customizing Butterfinger Balls, it’s time to explore how to serve and pair them for maximum enjoyment.
Serving Suggestions and Pairings
Perfect Pairings for Butterfinger Dessert Balls
Butterfinger Balls are delicious on their own, but pairing them with other treats can elevate your dessert game. Here are some simple yet creative ideas:
- With coffee or hot chocolate: The rich flavors of Butterfinger Balls complement warm beverages perfectly.
- On an ice cream sundae: Crumble a few balls over vanilla ice cream for an indulgent twist.
- With fruit platters: Add a few balls to a tray of fresh fruit for a delightful mix of textures and flavors.
These pairings make your dessert spread even more exciting, whether for a party or a cozy night in.
Presentation Ideas
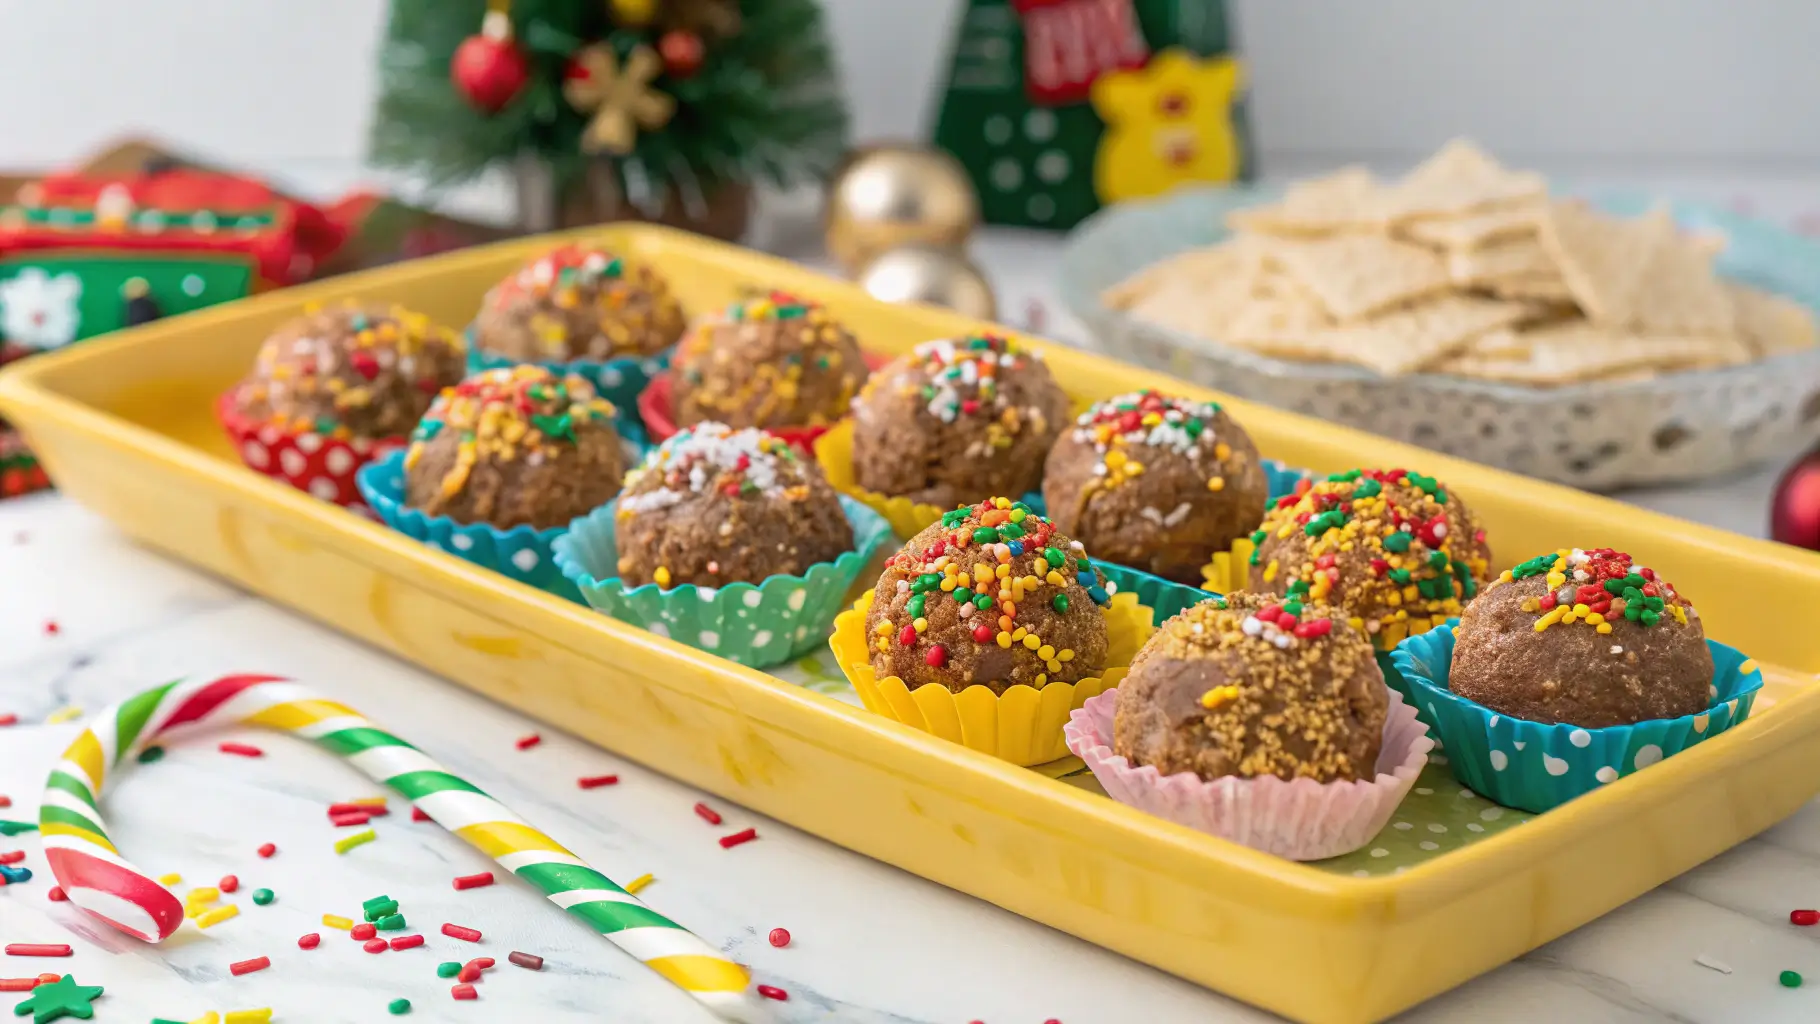
How you serve Butterfinger Balls can make them even more appealing:
- Decorative trays: Arrange the balls on a pretty tray lined with parchment paper.
- Festive themes: Add colorful sprinkles or holiday-themed toppers.
- Gift boxes: Wrap them in cellophane or place them in a small gift box for a thoughtful homemade treat.
Presentation matters, especially when serving guests or giving these tasty treats as gifts. With a little creativity, your Butterfinger Balls will look as impressive as they taste.
Common Questions About Butterfinger Balls
How Long Do They Last?
One of the best things about Butterfinger Balls is how well they keep. If stored properly in an airtight container in the fridge, they stay fresh for up to a week. For longer storage, you can freeze them for up to three months.
Can You Freeze Them?
Absolutely! Freezing Butterfinger Balls is a great way to have a ready-to-go dessert on hand. Simply place the balls in a single layer on a baking sheet, freeze until firm, and then transfer them to a freezer-safe bag or container. When you’re ready to enjoy, thaw them at room temperature for a few minutes.
What to Do with Leftovers
Got leftover Butterfinger Balls? Here are a few ideas:
- Crumble them as a topping for cakes or cupcakes.
- Blend them into milkshakes for a creamy, crunchy treat.
- Package them in small bags as take-home gifts for guests.
These tips ensure that every bite is enjoyed, leaving nothing to waste!
With serving ideas and answers to common questions covered, let’s wrap up with why Butterfinger Balls are such a must-try treat.
Conclusion: Why Butterfinger Balls Are a Must-Try Treat
If you’re looking for a dessert that’s both easy to make and guaranteed to impress, Butterfinger Balls are the answer. In addition, these bite-sized treats bring together the best of both worlds: the satisfying crunch of Butterfinger candy bars and the creamy, rich flavors of peanut butter and chocolate.
What sets them apart is their versatility. Whether you’re serving them at a party, giving them as gifts, or simply enjoying a sweet treat with your family, they fit every occasion. Moreover, with endless ways to customize and serve them, you can make each batch unique.
Therefore, why wait? Grab your ingredients and whip up a batch of Butterfinger Balls today. They’re fun to make, delightful to eat, and sure to be a hit with kids and adults alike. Once you try them, you’ll wonder how you ever lived without this simple yet satisfying treat!
FAQs
What Are Some Substitutes for Butterfingers?
If Butterfinger candy bars aren’t available, don’t worry. For example, you can use other peanut butter-based candies like Reese’s Pieces or crushed peanut brittle for a similar flavor and crunch.
Can You Make Them Vegan?
Yes! Replace the butter with coconut oil and use dairy-free chocolate for dipping. In addition, for the filling, opt for a plant-based peanut butter that contains no added milk solids.
Are They Kid-Friendly to Make?
Absolutely! Butterfinger Balls are a fantastic activity for kids. Not only will they love crushing the candy bars, but they’ll also enjoy rolling the mixture into balls and decorating them with sprinkles or crushed candy.
How Do You Prevent Sticky Hands While Rolling?
Sticky hands can be a common issue, but it’s easy to fix. For instance, dust your hands lightly with powdered sugar before rolling each ball. Alternatively, chill the mixture in the fridge for 10-15 minutes to make it less sticky and easier to work with.
This wraps up everything you need to know about making and enjoying Butterfinger Balls. With these tips, tricks, and variations, you’re all set to create a dessert that’s as fun to make as it is to eat. Happy baking—or rather, no-baking!

